Friday, August 28, 2009
Make this!

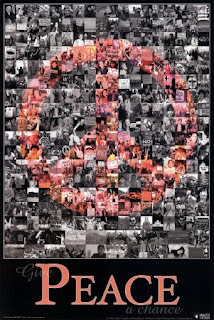
How to make a collage-type poster with your own images:
1. Start with a sheet of paper the desired size of your poster (If it's larger than average, you can find paper on a roll purchaseable by the yard - I found some in the framing section at Manglesen's)
2. Gather all the pictures you'd like to use in a folder on your computer. For a poster like the one above, change them all to greyscale. To make the image (in this case, a peace sign) choose the pictures to be that image, and change the tint. You can do this by fiddling with your computer's image editor, or go to lunapic.com, upload the photo, under the adjust tab select black and white, then under that same tab select color tint.
3. Once you have all your pictures, print them off or send them to a photo lab (i use walgreens.com)
4. Choose placement of photos, cut your colored pictures to the desired shape, and glue everything down using a spray adhesive or other glue - rubber cement works well. Make sure to choose an adhesive that can be pulled up and moved or re-cut if necessary.
5. You can take it somewhere and have it laminated if you would like, or just hang as is.
Friday, August 21, 2009
Friday, August 7, 2009
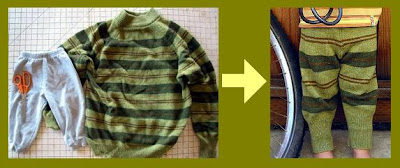
Sweater Sleeve into Kid's Pants

Tutorial over at Green Kitchen, a sweet craft blog that I now plan on visiting frequently. Not while at work, of course ;)
Wednesday, August 5, 2009
Paper Making
I've always wanted to make my own paper, after I did it during craft night at the local library. I gave it up after a failed attempt at making my own frames. But now it sounds like a cool idea again.
How to make paper, with help from funsci.com, among other websites
Supplies
Instructions How to make paper, with help from funsci.com, among other websites
Supplies
- deckle: wooden frame {idea: frames from dollar tree!}
- mold: sieve with holes of about 1 mm {budget saver: tulle}
- formica sheet {anything hard and flat in the right size will suffice, like if a picture frame is used, the glass could substitute for the formica}
- rectangular container large enough to fit the frame
- mortar and pestle or blender
- jug
- hairdryer
- newspaper {this tutorial recycles newspaper into paper; other materials could be used for a different effect: tissue paper, toilet paper, colored paper, printer paper,magazines, old cards, paper bags, napkins, construction paper, etc
- optional additions: dried grass, flowers
- flat sponge
- water
- cover one side of the frame with the mold (screen, tulle, whatever)
- soak the paper in water for a long time
- in the funsci.com tutorial, excess water is sqeezed out of the paper, which is then crushed into a fine paste using the mortar and pestle, then added to the water. an alternative is to simply blend the paper-water mix
- add paper mix to the rectangular container, adding water to get the right consistency {and some liquid starch, if wanted} this is also when you can add extra bits of torn up paper or other optional additions to get a unique finish
- immerse the frame into the paste, with the sieve side facing down. slowly remove it, with a layer of paper paste on top of the mold
- let the water drain, place the formica/hard surface on top of the paste to sqeeze out more water; use the sponge to suck water from the bottom through the mold
- flip over the frame so that the paper rests on the formica
- now it just has to dry! at the library, we flipped it onto paper towels, which help suck out moisture. you could use the hair dryer to speed up the drying process, or hang dry from a clothesline.
I'd love to add another paper-making post later, with my own pictures and results :)
Tuesday, August 4, 2009
more from Amy Atlas
I love this cake designed for a mother's day brunch all-green dessert table:
 and i love the all-green candy set up
 and i love the all-green candy set up
Monday, August 3, 2009
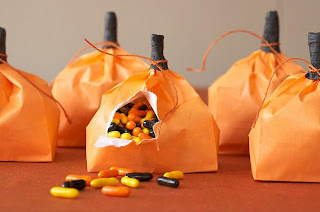
DIY bag lanterns
Subscribe to:
Comments (Atom)


 Learn how to do it
  found at